
How to Sync data from MySQL to BigQuery
How to Sync data from MySQL to BigQuery
The purpose of this blog is to provide information on how data can be synced/replicated to BigQuery for data warehouse purposes.
We have tried many tools to sync data consistently to BigQuery without a heavy load on MySQL and which can handle huge table changes on MySQL and still supports replication to BigQuery in near real-time. We found Fivetran the best tool to use for even large datasets
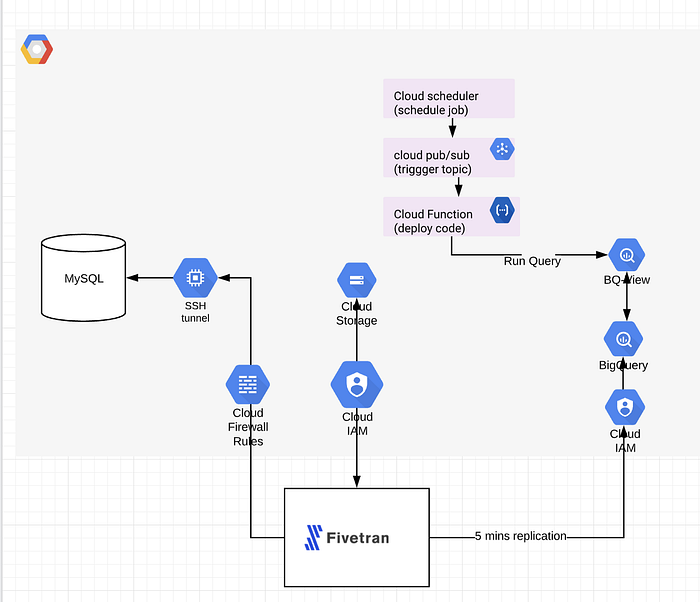
Here’s how you can do it using Fivetran:
Two ways to connect your database to Fivetran
- Connect Directly
While connecting directly, you must create a rule in a security group that allows Fivetran access to your database port and instance.
Configure your firewall and/or other access control systems to allow:
- Incoming connections to your host and port (usually 3306) from Fivetran’s IPs for your database’s region
- Outgoing connections from all ports (1024 to 65535) to Fivetran’s IPs
- outgoing connections from all ports (1024 to 65535) to Fivetran’s IPs
2. Using SSH
While connecting through an SSH tunnel, Fivetran connects to a separate server in your network that provides an SSH tunnel to your MySQL database. You must configure your tunnel server’s security group to allow Fivetran access and configure the instance’s security to allow access from the tunnel.
- You must connect through SSH if your database is contained within an inaccessible subnet.
If you’re using MySQL as the source database, there are prerequisites to consider.
- MySQL version 5.5 or above (5.5.40 is the earliest version tested)
- Database host’s IP (e.g., 1.2.3.4) or host (your.server.com)
- Port (usually 3306)
- Database administrator permissions to create a Fivetran-specific MySQL user
- Provide at least 1024MB for innodb_buffer_pool_size.
- Set the local_infile system variable to ON. Check the variable status with SHOW GLOBAL VARIABLES LIKE ‘local_infile’ and switch the status to ON with SET GLOBAL local_infile = true.
The steps are as follows:
- Create a user for this specific purpose and provide required privileges
CREATE USER fivetran@’%’ IDENTIFIED BY ‘password’;GRANT SELECT, INSERT, UPDATE, DELETE, CREATE, DROP, ALTER, CREATE TEMPORARY TABLES, CREATE VIEW ON *.* TO fivetran@’%’;
After successfully connecting to the source, now its time to setup BigQuery as the destination in Fivetran
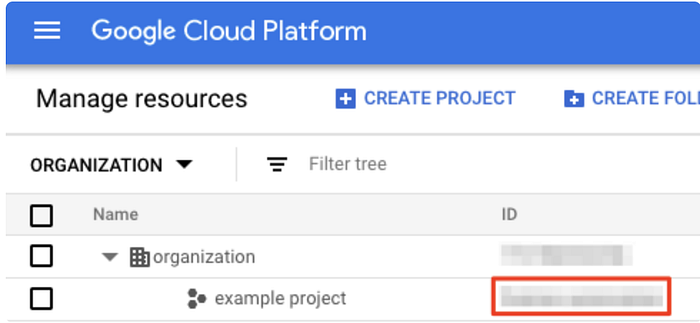
- Select the project
- Select the project where you need BigQuery to be in and the note ProjectID:
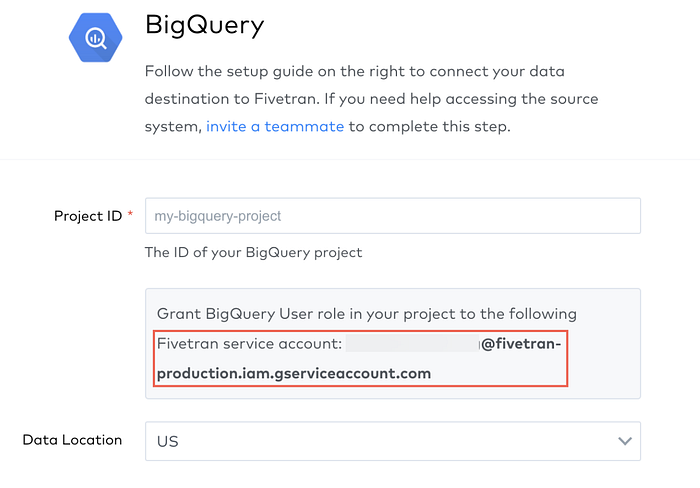
2. Locate the Fivetran Service Account:
- Go to https://fivetran.com/welcome/ setup destination form.
- Select that “I already have Destination” and select BigQuery.
- Make note of the service account from the Fivetran destination setup.
3. Configure Service account in GCP console.
- Go to the IAM & admin tab, and go to the project members list and select +ADD
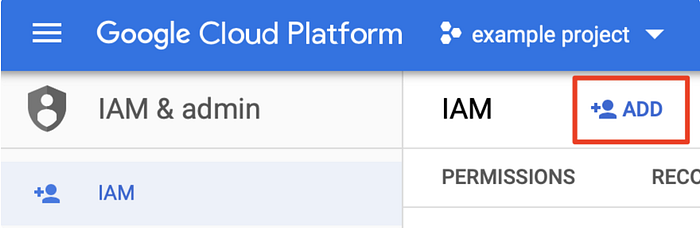
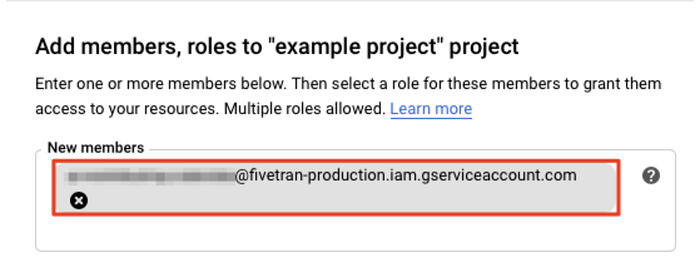
- Enter Fivetran service account in new members field which we got in the previous step
- Now click Select a role > BigQuery > BigQuery User.

4. If you are using a service perimeter to control access to BigQuery, setup a GCP Bucket to ingest data
Note: The bucket must be present in the same location as the dataset location.
After Connecting both source and destination now its time to give permissions to the Fivetran service account
The Fivetran service account in the setup form must be given Storage Object Admin permission for the bucket. So that it can read and write the data from the bucket. Here are the steps to do so
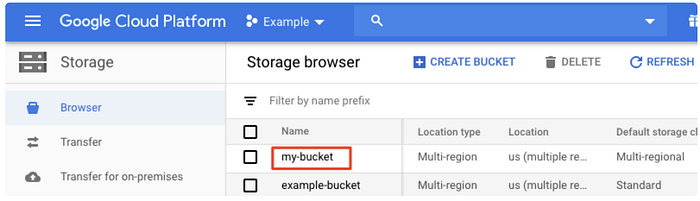
- Go to storage in GCP Console > bowser to list bucket in that project.
- Select the bucket to be used
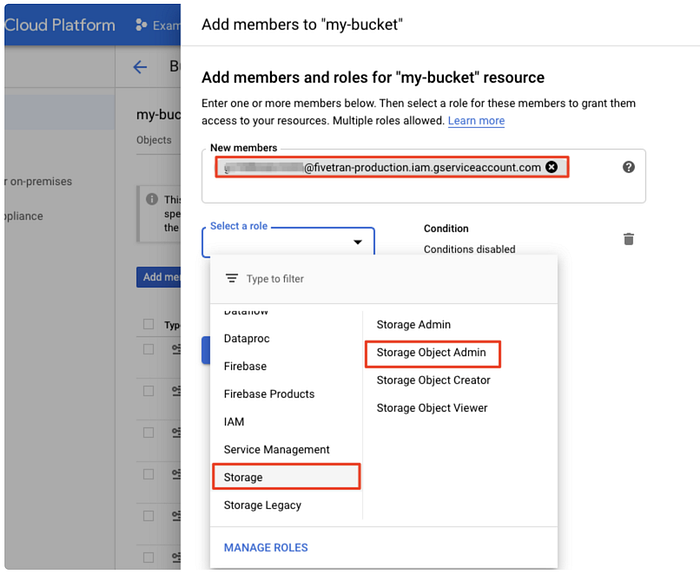
- Go to Permissions and then click Add Members.
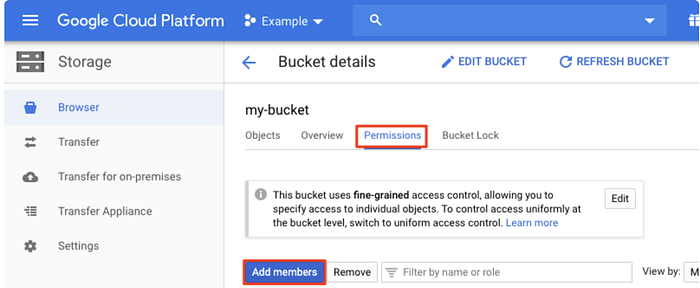
- In the Add members window, enter the Fivetran service account that was copied earlier.
- From the “Select a role” dropdown, select “Storage Object Admin”.
Now set the life cycle of objects in the bucket
It’s important to set a lifecycle rule so that data older than one day is deleted from your bucket
Here’s how you can set a lifecycle rule
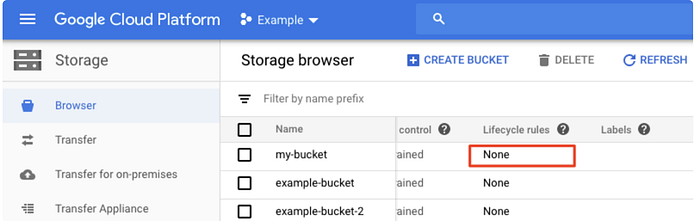
- Go to Google Cloud Console, go Storage > Browser to see the list of buckets in your current project.
- Go to list, find the bucket you are using for Fivetran, and in the Lifecycle rules column, select its rules.
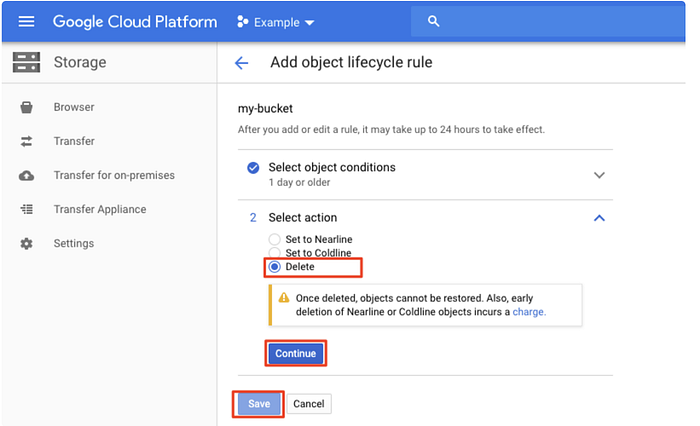
- Click Add rule. A detailed view will open.
- Go to Select object conditions, Select Age and enter 1, and the Continue

- Go to Select action, select Delete and then click on continue and then save.
Up to now we connected to source and destination to Fivetran and assigned require permissions to Fivetran. Here is our last step to finish this process which is configuring Fivetran
- Log in to your Fivetran account.
- Go to Manage Account Page
- Go to the Destinations tab, click +Destination.
- On the Add Destination To Fivetran page, enter a destination name of your choice.
- Click Continue.
- Select BigQuery as the destination type.
- In the destination setup form, enter the Project ID that was noted.
- Enter the Data Location.
- (Optional) If you want to use your GCS bucket to process the data instead of a Fivetran-managed bucket, set the use GCP Service Parameter toggle to ON, and then enter the Customer Bucket name you configured in Step 4.
NOTE: Make sure that the bucket is present in the same location as the datasets and the service account has Storage Object Admin permission for the bucket.
- Choose the Data processing location.
- Choose your Timezone.
- Click Save & Test.
Conclusion:
- Once saved and test, a table that needs to be synced to BigQuery can be selected from “SCHEMA” in the Fivetran dashboard.
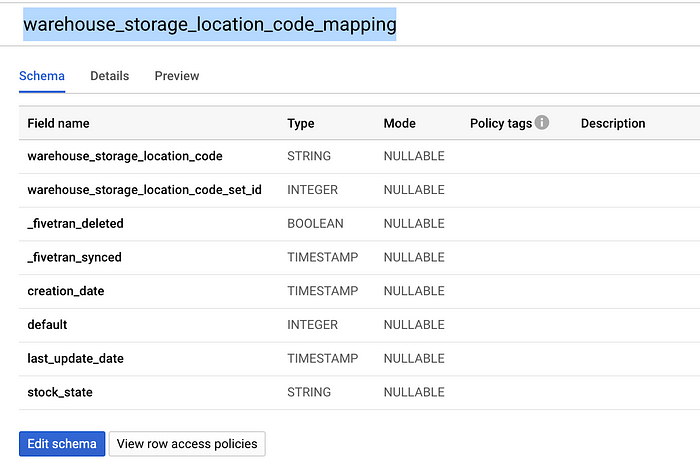
- Let us assume we need to sync a table named “warehouse_storage_location_code_mapping”
- In MySQL the table is as follows:
CREATE TABLE `warehouse_storage_location_code_mapping` (
`warehouse_storage_location_code` varchar(128) COLLATE utf8_unicode_ci NOT NULL,
`stock_state` enum(‘damaged’,’good’,’consuming’,’quarantined’) COLLATE utf8_unicode_ci DEFAULT NULL,
`warehouse_storage_location_code_set_id` int(11) NOT NULL,
`default` tinyint(3) NOT NULL DEFAULT ‘0’,
`creation_date` timestamp /* 5.5 binary format */ NOT NULL DEFAULT ‘0000–00–00 00:00:00’,
`last_update_date` timestamp /* 5.5 binary format */ NOT NULL DEFAULT CURRENT_TIMESTAMP,
PRIMARY KEY (`warehouse_storage_location_code`,`warehouse_storage_location_code_set_id`),
KEY `acks_create_nk1` (`warehouse_storage_location_code_set_id`,`stock_state`)
) ENGINE=InnoDB DEFAULT CHARSET=utf8 COLLATE=utf8_unicode_ci ROW_FORMAT=DYNAMIC;
4. After syncing this table to BigQuery, it looks like below:
Fournine Cloud Solutions
Our technical experience on AWS, Azure, GCP, Databases and…
